MikroTik RouterOS stands out for its rich range of tools that allow network administrators to have precise control over their infrastructures. Among these tools, Netwatch emerges as an essential resource to monitor and automate actions on the network.
At the end of the article you will find a small test that will allow you assess the knowledge acquired in this reading
Basic Netwatch Configuration
Before we dive into specific examples, it is essential to understand the basic configuration of Netwatch. The basic syntax involves creating a Netwatch rule, specifying the IP address or domain name of the resource to monitor and the script to be executed when the set conditions are met.
/tool netwatch add host= interval= timeout= \
up-script= down-script= comment=
- host: The IP address or domain name of the resource to monitor.
- interval: The time interval between checks.
- timeout: The time limit to consider that the resource is not available.
- up-script: The script to run when the resource becomes accessible.
- down-script: The script to run when the resource becomes inaccessible.
- comment: An optional comment to describe the rule.
Important: These properties are available in RouterOS v6 up to RouterOS 7.3.1
Starting with RouterOS v7.4, Netwatch functionality has been expanded; previous versions only supported simple ICMP options. While, when upgrading to the new version, the old Netwatch entries will remain unchanged, reporting the option type “simple”, retaining the same functionality. Monitoring can be carried out based on the following types:
- ICMP - Pings a specific IP address - hosts, with an option to adjust threshold values
- Simple: use ping, without using advanced metrics
- TCP conn: to test the TCP connection
- HTTP GET/HTTPS GET: request against a server you are monitoring
Practical Examples of Using Netwatch
1. Automatic Interface Restart
Suppose we want to automatically restart a router interface when we detect that the connection to a specific server is down. We can achieve this by configuring Netwatch to monitor connectivity to the server and run a script that restarts the interface if the connection is lost.
/tool netwatch add host=my_server.com interval=10s timeout=5s \
down-script="/interface ethernet restart ether1" comment="Restart ether1 if connection fails"
2. Connection Loss Notification
Instead of performing automatic actions, we can configure Netwatch to send a notification when connection to a critical resource is lost. In this example, we will send an email when a web server is unavailable.
/tool netwatch add host=my_web_server.com interval=30s timeout=10s \
down-script="/tool e-mail send [email protected] subject=Alert! Web Server Not Available body=The web server is not responding." \
comment="Notify loss of connection to the web server"
3. Automatic Response to Ping Loss
Netwatch can also be used to automatically respond to a device's loss of connectivity by running custom scripts. Below is an example of changing the configuration of a firewall rule when connectivity to a device is lost.
/tool netwatch add host=critical_device interval=20s timeout=8s \
down-script="/ip firewall filter set [find comment='Allow_Critical_Device'] disabled=yes" \
up-script="/ip firewall filter set [find comment='Allow_Critical_Device'] disabled=no" \
comment="Change firewall settings when connectivity is lost"
Conclusions and Final Considerations
Netwatch on MikroTik RouterOS is a powerful tool that provides network administrators with the ability to automatically monitor and respond to changes in the state of network resources.
The flexibility to run custom scripts in response to specific events provides granular control over the network infrastructure.
By strategically deploying Netwatch, administrators can improve the availability, efficiency, and responsiveness of their networks, reducing downtime and improving the user experience.
Understanding basic configuration and applying practical examples allows network professionals to make the most of this versatile tool in MikroTik RouterOS.
Brief knowledge quiz
What do you think of this article?
Do you dare to evaluate your learned knowledge?
Recommended book for this article
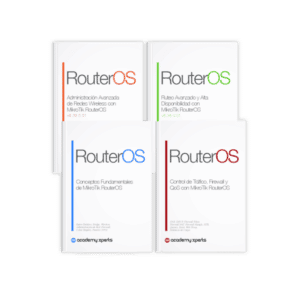
MikroTik Fundamental Concepts Book, RouterOS v7
Study material for the MTCNA Certification Course, updated to RouterOS v7
Related Posts
- MikroTik and Wireless Authentication: Understanding 'Allow Shared Key'
- Bandwidth Test and Speed Test Tools in MikroTik RouterOS
- MikroTik IPSec: Choose between Tunnel Mode and Transport Mode for VPN
- HSRP, VRRP, GLBP: Understanding Key Protocols for Network Redundancy
- Ways to Assign IPv6 Addressing (Part 2)