

No Courses Found!
Global vision of ethical hacking and penetration testing
Global vision of ethical hacking and penetration testing
Information Security Regulations How to implement?
Introduction to Data Science with Python
Global vision of ethical hacking and penetration testing
Information Security Regulations How to implement?
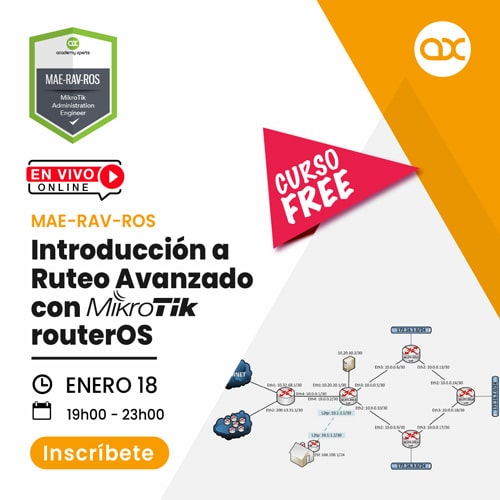
How to properly manage multiple public or private IPs on the edge router
Ways to assign public IP addresses to clients with MikroTik
Guide to configuring Internet egress routes with two or more providers (failover, balancing and recursion)
Filter implementation strategies to restrict access to web pages with MikroTik
Guide for Firewall configuration in MikroTik RouterOS
Filtering threats: Firewall rules to protect the router from common network attacks
Practical solutions to optimize network infrastructure: Subnetting strategies, Routing and NAT troubleshooting
BGP as a routing protocol to advertise IPv4 resources to the Internet
Forms of Delivery and Implementation of IPv6 in ISP Environments
BGP as an Internal routing protocol in a routed network
OSPF as an Internal routing protocol in a routed network
Guide to start our first IPv6 Firewall
Guide to building an Advanced Firewall in IPv6
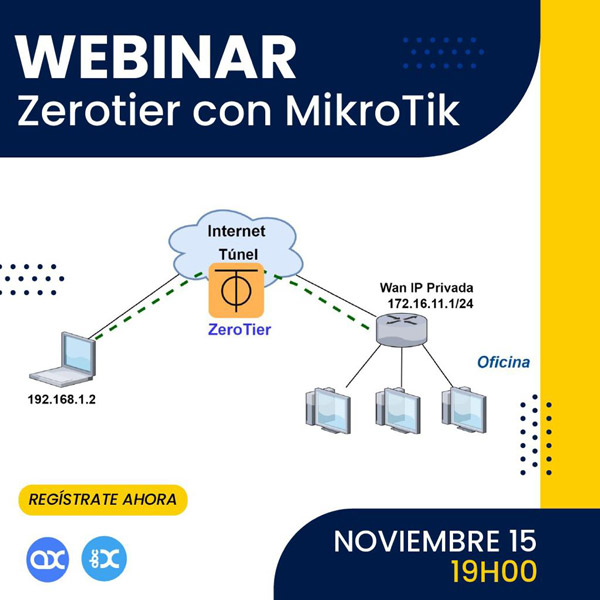
Wireguard in MikroTik RouterOS v7
OSPFv3 Internal routing protocol
BGP over IPv6 as a routing protocol to advertise IPv6 resources to the Internet
Implementation of mark-connection and mark-packet for QoS
Simple Queues in MikroTik RouterOS v7
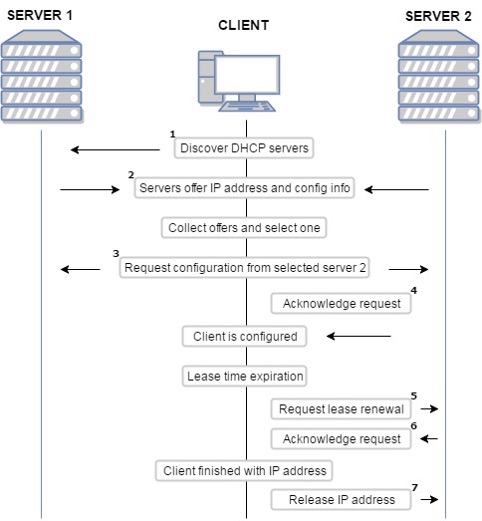
The DHCP (Dynamic Host Configuration Protocol) protocol is used for easy distribution of IP addresses on a network. RouterOS Mikrotik includes both parts: Server / Client.
The router supports an individual DHCP server for each Ethernet interface. The Mikrotik server with the main functions is to provide a client with assignments of an IP address with its respective IP mask, as well as the address of the gateway and the DNS server.
The interface that hosts the DHCP server must have its own IP address and at the same time must not be included in the pool of addresses that clients will receive when they request it.
The DHCP protocol is located at the Network layer of the protocol map.
The process for assigning an IP address to a client is as follows:
DHCP-DISCOVER.
src-mac= , dst-mac= , protocol=udp, src-ip=0.0.0.0:68, dst-ip=255.255.255.255:67
DHCP-OFFER.
src-mac= , dst-mac= , protocol=udp, src-ip= :67, dst-ip=255.255.255.255:67
DHCP-REQUEST.
src-mac= , dst-mac= , protocol=udp, src-ip=0.0.0.0:68, dst-ip=255.255.255.255:67
DHCP-ACKNOWLEGMENT.
src-mac= , dst-mac= , protocol=udp, src-ip= :67, dst-ip=255.255.255.255:67
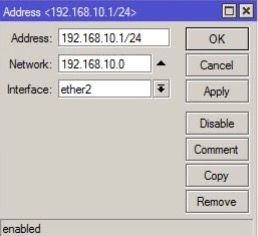
The interface that is to be configured as DHCP-Server must have its own address and at the same time that address must not be included in the pool of an address. A pool is a range of addresses that will be available to clients.
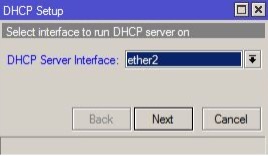
In the DHCP-Server window, press the DHCP Setup button and then continue with the requested requirements:
1. Interface to which the DHCP server will be assigned:
2. Network address:
3. Gateway:
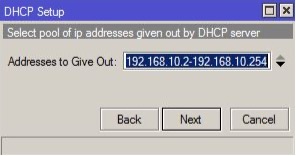
4. Address pool for DHCP clients:
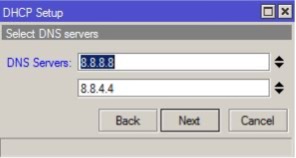
5. DNS server (more than one can be used):
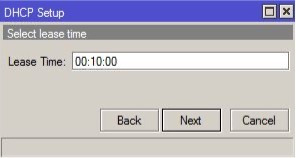
6. Time of assignments:
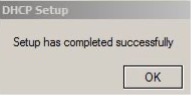
7. Then we press next and in this way the process ends:
In the window you can see the DHCP server created.
In this automatic configuration (by running DHCP Setup) the following parameters are generated:
IMPORTANT NOTE: if you have a bridge environment, the DHCP server must be configured on the bridge interface. If the DHCP Server is configured on a port that is part of the bridge, the DHCP server will not work.
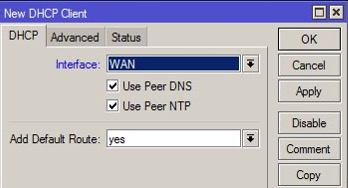
Allows an Ethernet interface to request an IP address
Av. Juan T. Marengo and J. Orrantia
Professional Center Building, Office 507
Guayaquil. Ecuador
Zip Code 090505
to our weekly newsletters
Copyright © 2024 abcxperts.com – All Rights Reserved
40% discount on MikroTik books and book packs - Discount Code: AN24-LIB Discard
Take advantage of the Three Kings Day discount code!
Take advantage of the New Year's Eve discount code!
Take advantage of the discount code for Christmas!!!
all MikroTik OnLine courses
all Academy courses
all MikroTik Books and Book Packs
Take advantage of the discount codes for Cyber Week!!!
all MikroTik OnLine courses
all Academy courses
all MikroTik Books and Book Packs
Take advantage of the discount codes for Black Friday!!!
**Codes are applied in the shopping cart
Take advantage of discount codes for Halloween.
Codes are applied in the shopping cart

11% discount on all MikroTik OnLine courses
11%

30% discount on all Academy courses
30%

25% discount on all MikroTik Books and Book Packs
25%


1 comment on “Chapter 2.4 – DHCP Server and DHCP Client”
Check the ports in the send and response packets.